Epoxy countertops are having a very understandable moment. They can turn a dated laminate surface into something glossy, colorful, and custom-looking without the price of replacing every cabinet. I love a makeover that changes the mood of a room, but I also want to talk about the parts Instagram tends to crop out: sanding dust, cure times, drips, and the fact that shiny surfaces show everything.
I am not a professional contractor. I am a designer who has decorated several apartments and learned, sometimes expensively, that a beautiful finish depends more on preparation than enthusiasm. If you are considering epoxy countertops, this is the friendly reality check I would give a friend standing in the paint aisle with three sample kits in her cart.
What makes epoxy countertops appealing
Most countertop epoxy is a two-part coating made by mixing resin with hardener. Once blended, it creates a thick, glossy surface that can be tinted, layered, and poured over materials such as laminate, wood, or properly prepared tile. The result can imitate marble veining, a solid jewel tone, terrazzo flecks, or a quiet warm white.
The visual payoff is the main attraction. A brown, speckled laminate counter can become creamy white with soft gray movement. A plain rental kitchen can feel more intentional when the counter color relates to the backsplash, faucet, or wood floor. The finish also forms a seamless surface over small scratches and dated patterns, so the room feels less visually busy.
There is a practical advantage, too. A quality kit from brands such as Stone Coat Countertops, TotalBoat, or Counter Culture DIY often costs far less than new quartz. For a small vanity or island, materials might run around $150 to $350. A larger kitchen can require $400 to $900 in resin, primer, pigments, tools, and protective supplies. Professional labor would add considerably more.
How much preparation do epoxy countertops need?
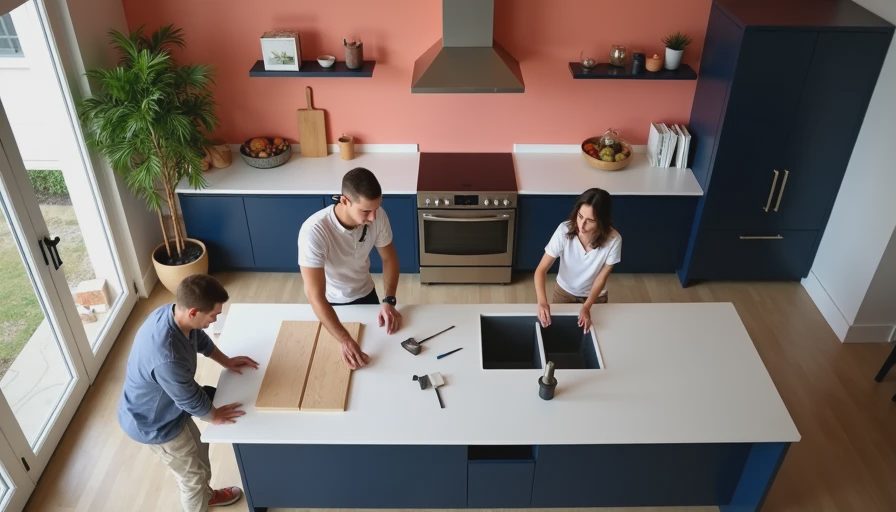
Preparation is where the project is won or lost. First, remove everything from the counter and clean away grease, wax, silicone residue, and old polish. Dish soap alone is not enough if the surface has years of cooking film. A degreasing cleaner followed by a clean-water wipe is a better start.
Next, repair chips, loose seams, and swollen laminate edges. Epoxy will not magically stabilize a countertop that is separating from its substrate. Fill damaged spots with an appropriate repair product, let them cure, and sand them smooth. Then sand the entire surface so the coating has something to grip. You are not trying to remove all of the old color; you are creating a consistently dull texture.
Masking takes longer than expected. Cover cabinet faces, walls, floors, appliances, sink openings, and handles with painter's tape and plastic. The resin is self-leveling, which sounds helpful until you realize it will also self-level straight onto the floor. Have disposable gloves, mixing cups, stir sticks, a small torch or heat gun if the manufacturer recommends one, and a dust-free place for curing.
If your kitchen has a sink, plan the edges carefully. Water can collect at an unsealed seam, especially around an undermount sink. Follow the kit directions for compatible caulk and topcoat rather than assuming any tube from the hardware store will work.
Choosing a color and finish you will still like next year
The hardest design decision is not white versus black. It is deciding how much movement you can live with. Dramatic marble-style epoxy countertops look exciting in a sample video, but large swirls can dominate a small kitchen. In my own decorating, I prefer a quiet base with one or two intentional accents: warm ivory, a little taupe, and a thin gray vein rather than a whole thunderstorm of contrast.
Look at your fixed elements first. If your floor is orange-toned oak and your backsplash is cool white, a stark blue-white counter may make both look more extreme. A creamy neutral can bridge the gap. If you have dark green cabinets, a softly veined beige may feel collected; bright white could make the cabinetry look heavier by comparison.
Make a sample board before coating the actual counter. Use scrap laminate, cardboard sealed with primer, or a small piece of MDF. Test the color in morning light, evening light, and the light you use while cooking. Pigments can look different once mixed into resin, and metallic powders often spread farther than expected. A sample also lets you practice the motion of pouring and blending without panicking over your real kitchen.
Epoxy countertops are durable, but not indestructible
A cured epoxy surface is water-resistant and generally easy to wipe clean. It can handle ordinary food preparation, coffee spills, and daily traffic when installed and maintained correctly. That does not make it a cutting board or a trivet. Hot pans, sharp knives, abrasive scrubbers, and harsh solvents can damage the finish.
Use a cutting board every time and place a silicone mat beside the stove for hot cookware. Clean with a soft cloth and mild dish soap. Avoid scouring powders and rough sponges that can dull the shine. Some products recommend a protective topcoat for extra scratch or UV resistance, which is especially useful near a sunny window.
The biggest long-term concern is heat. A pot placed directly on the counter can leave a cloudy mark or soft spot. Repairs are possible, but they are not always invisible. If you love the low-maintenance idea of quartz, remember that epoxy requires a little more household discipline.

Common mistakes that make the project harder
The first mistake is rushing the mix. Resin and hardener must be measured accurately, usually by volume or weight according to the product instructions. Too much of one component can leave the surface tacky or poorly cured. Scrape the sides and bottom of the cup while mixing, then transfer the mixture into a clean cup if the instructions call for a double mix.
The second is ignoring temperature. Cold rooms can slow curing, while excessive heat can shorten working time. Aim for the range recommended by the manufacturer and keep pets, dust, and curious guests away. My cat Saffron would treat an open resin project as a personal invitation, so a closed room and a very boring evening are essential.
The third is overworking the finish. A heat gun can help release bubbles, but lingering in one area can scorch the coating or create ripples. Tiny imperfections are often less noticeable than a large burned patch. Follow the timing instructions, then leave the surface alone.
Finally, do not skip the cure period. A counter that feels dry on top may still be soft underneath. Wait before replacing appliances, washing dishes in an adjacent sink, or stacking heavy cookware on the surface.
Is this the right upgrade for your home?
Epoxy countertops make sense when the existing surface is structurally sound, the budget is limited, and you want a major visual change. They are especially appealing for a small island, bathroom vanity, laundry room, or temporary kitchen update before a larger renovation. A well-planned project can deliver a custom look for a few hundred dollars instead of several thousand.
They are less attractive if the counter is swollen, moving, badly cracked, or exposed to intense heat every day. They also demand a patient weekend and a willingness to follow instructions precisely. If you rent, ask for written permission before changing the surface; a low-cost makeover is not worth losing a security deposit.
Before buying, calculate the square footage, read the coverage rate, and add roughly 15 percent for waste and mistakes. Compare the full kit price with the cost of primer, pigments, tape, plastic, gloves, sanding supplies, and a backup mixing cup. Those small items can add $50 to $150 quickly.
My favorite approach is restrained: choose a color that connects two existing finishes, create a sample first, and treat preparation as part of the design rather than an annoying prelude. Epoxy countertops can be cheerful, polished, and completely personal when the surface underneath is ready and the styling is not trying too hard. Start with what you love. The rest finds its place.